Showing posts with label scrapbooking layouts. Show all posts

Monday, November 10, 2014

Christmas Ornaments for Scrapbooking

Oh, I am already thinking about Christmas and scrapbook pages. I always enjoy adding handmade items and tags for my pages. 


The ornaments are added to the upper right corner of the page and are from the TH Mini Blueprints 5 CMS 170 set with lots of distress glitter added for sparkle. Christmas means lots of sparkle to me!! The stencil is TH Hollybough. Wow, I am so happy I have something ready for my Christmas 2014 scrapbook pages - Judy!

Challenges:

Simon Says Monday Challenge: Ornaments

Friday, August 29, 2014

A Little Witch Kraft

The Challenge over at Simon Monday Challenge is: Witch Kraft. Wow, I love kraft paper and of course, I always love a little witchy. Here's my project:


My project started with a kraft glassine pocket that I embossed with the Bubbles folder from the Waves & Bubbles Set. I wanted the bubbles to resemble the bubbles from a boiling pot of witches brew. I originally thought I was only going to make a pocket of spells but that soon changed into a scrapbook layout. 


Once I decided I wanted to create a scrapbook layout, the theme was perfect, I love to use kraft paper when I scrap. I selected a couple of different kraft papers and I was happy. Next I misted the paper with water and started applying Distress Paint - picket fence. 


I love the look with the paint on the kraft. 


It tones the paper down.


Now I can stamp a little witchiness. I was a little leery that my stamps might now show as good as I wanted them to so I stamped on tissue paper then adhered them with Claudine Hellmuth's multi-medium matte.


I know you are wondering about these two cute little Wizard of Oz characters "Toto" and the "Lion."  The are my grandsons!


The matte for the picture was made from another piece of kraft glassine that I crumbled up then distressed with gathered twigs. I did pat the glassine after I inked it to remove any excess ink then heat dried it. 


Thanks for stopping in for A Little Witch Kraft - Judy

Supplies:
TH Distress Paint: picket fence, mustard seed, peeled  paint
Ranger Super Fine Detail Black embossing powder on the spider web
TH Distress embossing powder - antique linen on the broom
TH Distress ink: ripe persimmon, rusty hinge, gathered twigs, antique linen, mustard seed, scattered straw
Archival Jet Black ink
Emboss It - clear
Apothecary Remnant Rubs 
Stamps: Graphic 45 Magic of Oz Stamp Sets 1, 2, 3
and Tim Holtz Mini Halloween CMS 198, Mini Blueprints 5, CMS 170, Apothecary CMS 138


Challenges: 
Simon Monday Challenge: Witch Kraft
Inspiration Emporium: Anything Goes
Eclectic Paperie: August Challenge: Embossing  done on the spider web, spider, and broom stick


Wednesday, February 26, 2014

Snowy Blues

Well, I must admit that I have had this background paper stamped for over 2 years and just thinking about using it for a ski trip layout. But now, I have completed the project with images from a trip my daughter and family took with her in-laws to Breckenridge, CO.


I used shades of blue for this layout with lots of stamping and inking. The special tag was made for the layout and the snowman embossing folder was used on the tag then run again and cut out for the raised snowman. Several snowflakes were cut from a Sizzix Die then I covered the snowman and snowflakes with Distress stickles dry glitter - clear rock candy.


So now my hoarded stamped paper has been used - Judy.

Supplies:
TH Distress stickles dry glitter 
Ranger Frosted Lace Stickles 
TH Dstress Stickles - Clear Rock Candy 
Distress Paint: broken china, picket fence
Adirondack Arrylic Paint Dabber: pool, cloudy blue
Distress Ink: 
Stamps: Inkadinkado Snowflakes
Linking to: 

Craft Hoarders Anonymous Challenge #2: Let's See That Hoard

Sunday, November 17, 2013

Fall Layout

Last night I finished one of my Fall scrapbook pages but needed to wait until today for natural lighting to take my pictures. I love the colors of fall and enjoy making scrapbook pages of trips to the pumpkin patch with my grandsons and family.


My page is all about Fall colors, inks, and Liquid Pearls. I used a new technique I saw on the Ranger Ink website with Liquid Pearls, and inks. I used three colors of Liquid Pearls on my craft sheet, mixed in a little water, ran my paper through the mixture, heat dried, then blended two different distress inks. The ink only sticks to the unpainted parts of the paper. Then I stamped the leaf stamp with black archival ink, cut it out, and used a pop dot to apply it to my page. 


With some of the extra sections of the paper left over from the above stamping, I stamped the Fall Colors stamp. 


Supplies:
Ranger Liquid Pearls: Gold Pearl, Cantaloupe, Chestnut
Distress Ink: ripe persimmon, gathered twigs, brushed corduroy
Background Paper: Bo Bunny - Autumn Song
Stamps: TH Stampers Anonymous Autumn Blueprint; Close To My Heart

Linking to: 
Simon Says Monday Challenge: Got Ink

Tuesday, November 5, 2013

Christmas Patchwork

My scrapbook layout is a patchwork design. Take a look:


Supplies:
Distress Ink: gathered twigs and black soot
Papers:
  - Graphic 45 Curtain Call Collection
  - Kraft Core 
  - Graphic 45 Christmas Emporium Collection - A Christmas Carol
 - Bazzill cardstock 
Stamps: Tim Holtz Stampers Anonymous Mini Blue Prints CMS170, Tim Holtz Stampers Anonymous Candy Cane Sketch
Die: Tim Holtz Alterations: Gingerbread
Distress Markers: evergreen bough and festive berries

Challenges:
Simon Says Monday Challenge: Patchwork
Created With Love Challenge: Christmas Reds and Greens
Make It Monday: #165
Love to Scrap: Anything Goes
Through The Craft Room Door: Nov 5-11 Challenge
Tuesday Throwdown

Wednesday, October 16, 2013

Alaska Fishing - Scrapbook Layout

I have been so inspired by Simon Says Monday Challenge: Nautical  this week that I have completed a scrapbook page of a fishing trip in Alaska. 

I must have been waiting for the right  inspiration to get me going on this page. I have had the pictures printed for a while but just hadn't found the inspiration I needed until this week.  I included a tag to write a few of the memories of this halibut fishing expedition that my husband and son-in-law took while we were in Homer, Alaska.


Thanks to the Design Team at Simon Says for this much needed Nautical inspiration. - Judy

Supplies: 
background scrap paper from my stash (had it for several years)
Distress Paint: picket fence
Distress Stains for edges of paper: Ranger Tim Holtz: stormy sky and brayed burlap. 
Archival Ink - Wendy Vecchi: Fern Green, Potting Soil
Archival Ink: Jet Black
Stencil: Heidi Swapp small circles
Sizzix Die
Tim Holtz Kraft-Core paper for picture mounting
Tim Holtz Idea-Ology Sanding Block
Tim Holtz idea-ology Linen Ribbon
Tiny Attacher
Stamps: Inkadinkado

Sunday, March 3, 2013

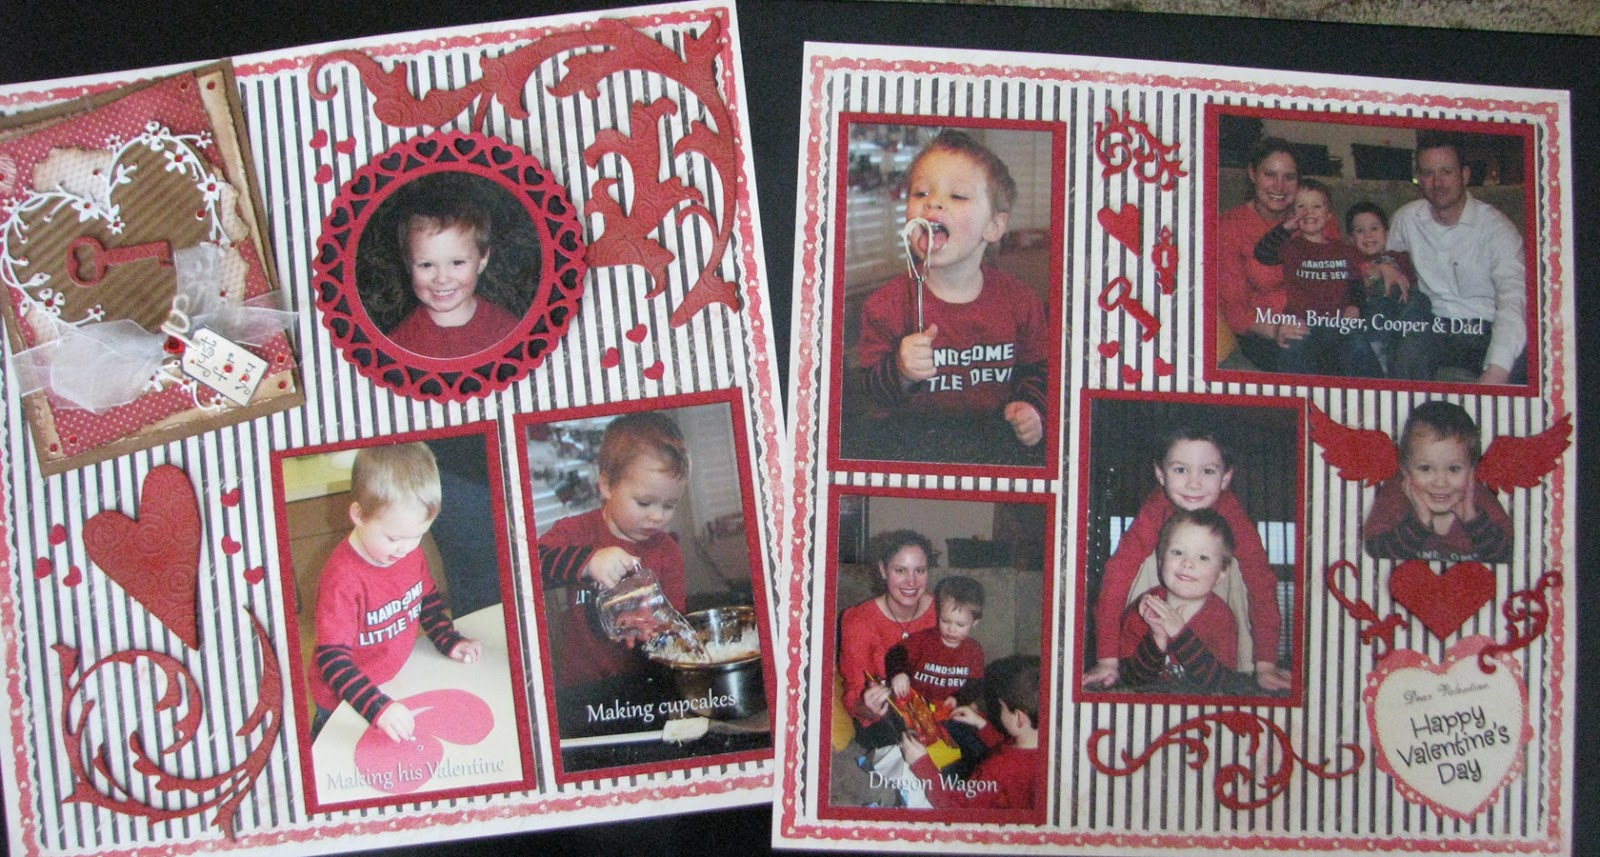
With Love Scrapbooking Layout

The Simon Says Challenge is "the stamp you love (but don't use)...

My entry for the challenge includes two stamps that I never seem to use but worked perfect for my scrapbook layout. Here's the layout then I'll show you closeups of the stamps.


I made the corner embellishment first and yes, I know it looks like a card, but it doesn't open and is simply an embellishment. The tiny stamp "Just for You" is tied to the bow. It is about the size of an A2 card if you wanted to make a similar card. There are lots of layers in this element.


The second stamp was one I found in my container of stamps, it's a Hero Art stamp and perfect for the layout.

You know how you dig through your stash and just seem to find the perfect elements. Guess it pays to dig! I found all the Tim Holtz Grungeboard pieces used on the layout in a sack in my stash. They were then stained with Distress Stains and adhered to the pages. 

Other elements:
·        Spellbinders Nestabilities Decorative Elements Heart Circle and Standard Circle
·        Memory Box Bingham Heart and Grand Heart

Paper is *Authentique 12 x 12 LOVELY Paper & Stickers LOV010

Challenges:
Simon Says Challenge: the stamp you love (but don't use) . . 
Layer it On and Share A Word at Frilly and Funkie
Anything Goes at Simon Says Stamp Challenge

Friday, February 1, 2013

Seeing Stars Scrapbooking Layout

The inspiration for my Seeing Stars theme came from the stars I was using on my grandson's scrapbook layouts for his soccer and T ball pages. 

I used the Sizzix Stars #2 die to cut the large, medium and small stars for the layouts.

The star border was cut using a svg file with the Sure Cuts A Lot program. 

Lots of fun memories were created when this "little star" played soccer and T-ball over the summer.

Challenge:
Simon Says Stamp and Show: Seeing Stars


Monday, July 9, 2012

Patriotic Layout With Layers


Both versions are designed with many layers of paper. Below is the second version, it is similar to the first but the bottom border is the reverse side of the same paper. The paper for the layouts is all from Authentique - Glory collection. The red color used to ink the bottom border was Tim Holtz Distress Ink Pad Barn Door.

Five papers from the Glory Collection were used to create this design:Pride (both sides, United (both sides), Freedom, Liberty and Allegiance. I did also purchase the sticker sheet but am not ready to use those until I add my pictures.

The bunting in the right corner is also made with multiple layers. The ribbon paper was from a local thrift shop that I strained with Tim Holtz Distress Stains Barn Door and Chipped Sapphire. That part was so simple, the ribbon paper took the stain perfect. You can see the two colors better in the top picture.

The heart stamp was created by first creating my own stamp pad. I selected any stamp I wanted to use and stamped it with Archival Ink Pads by Ranger onto the felt pads. Then inked the pad with Tim Holtz Distress Reinkers since I had a patriotic stamp, I chose Barn Door and Chipped Sapphire Ink Reinkers to fill the pad. Now I was ready to stamp on my paper and could reuse the pad many times.

Thanks for stopping by - Judy.

Linking to